I already had a walkway with stepping stones in place so that made it relatively easy to do. Just submerge some stepping stones if you do not have an existing path of stepping stones or just lay them flat on the ground if you want. Lay out some black edging and tamp it into place using the stakes that come with it. I was not that happy with the edging until we did the gravel then I was happy. However I probably should have bought the metal type you knock into the ground but I thought it would be a pain with roots,etc....this just laid on top of the existing ground and was held in place by little stakes ( but again I was working with less stakes than I should have been so there is a slight curve to it but that can be fixed later if I want to do so). I also am not finished b/c it merges with two other paths so that makes mine a bit complicated on each end which hopefully yours will not be. I am not finished in those ends yet so understand that this is not 100% complete.
Here is the process end to end.....so easy try it yourself sometime....it was relatively inexpensive as well...I got the edging at Lowes for $10 i think it was and the bags of gravel ( i used four in this section) was $3 plus for each bag so roughly $14 for some gravel and $1 plus change for a plastic drop cloth....so all in all, under $30 to have a nice walkway ( well plus the cost of stepping stones but they are under $2 per stone) so for $40 to be fair you could have a nice walkway for your home or office!--Tips
this is what I started with....the stepping stones seen to the left curve to the left in an arch and so I stopped my edging up higher so the two paths would combine at the intersection....in the grass you see the cut outs in brown where the stepping stones were but we moved them outside the area we would be laying plastic. we also had held the plastic edging in place with stakes already.
this was a dropcloth I used in lieu of the plastic trashbags which worked but were problematic at the intersections btw bags....this made it an easy thing to deal with the plastic and it was cheaper than the bags!
just seeing how long the drop cloth would go...notice the edging on the left stops before the plastic does
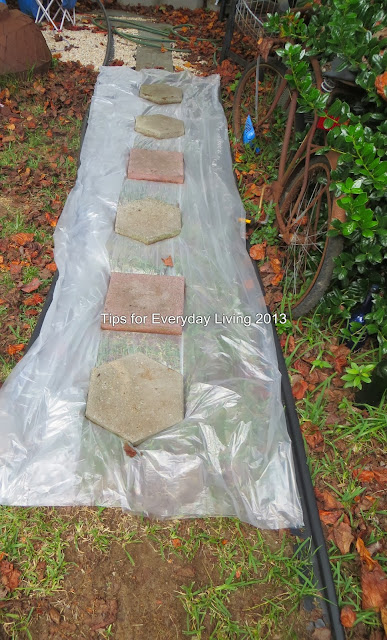
we spread it out but kept it folded in half so no weeds grow through it....that is what the plastic is for....to prevent weeds growing through the gravel.....
we then laid the stepping stones back where there were initially placed ( if you do not have an existing path just lay them directly on the ground but you will have to bring your gravel level up higher or be ok with a slight drop between the gravel and stepping stones)
here is an image of all the stepping stones back in place on top of the plastic....again....my walkway combines with another one besides it that goes to the left in an arch so yours won't be as complicated....)
we then laid the bags of gravel on top of the stones and cut them open....you don't want them too close to edge b/c if you lose rocks you are losing money
i emptied mine on top of the stepping stones then wiped them off of them and toward the edging....make sure no rocks go under the plastic but instead lay on top of the plastic and hold it down....cover all areas of plastic
we ended up with some plastic sticking up which is not a big deal....you can either trim it with scissors.....
or we just pushed it down and covered it with rocks....
this is what we ended up with after very little effort.....I am very pleased with the result....so easy and took very little time....under 2 hrs....I think it took about 1.5 hrs if that! Again there is a slight curve to the path on the left edge but I was without enough stakes and if it bothers me I can push it in and hold it in place using a stake from the next set of edging I buy. Again, the ends are not completed yet but overall I am very pleased! Try it sometime and beautify your home or office!! So simple and makes a nice pathway!--Tips


No comments:
Post a Comment